Tuesday, August 30, 2011

Day 5 of the "I too can bake bread challenge" -A Penny Loaf

So today is the day that we can eat the fruits of our labor. Just think, you'll be a bread making pro in no time. Not only is it fun, but it's also super cheap to make (hence the title of the post). If you are just joining in or if you've missed any of the installments of our "I too can bake bread challenge" you can catch up here to get started on your sourdough, or if you are ready to bake, you can catch up here.


To bake:
Once your 12 hour allotment of time has expired, you can proceed with either of the directions. As I have stated before, I do not have a degree in Molecular Science of Culinary Creations, (see here for the inside joke) nor am I advocating to be an expert, I'm just basing it off of my past bakes. I have done bread either way, and both taste just as good.


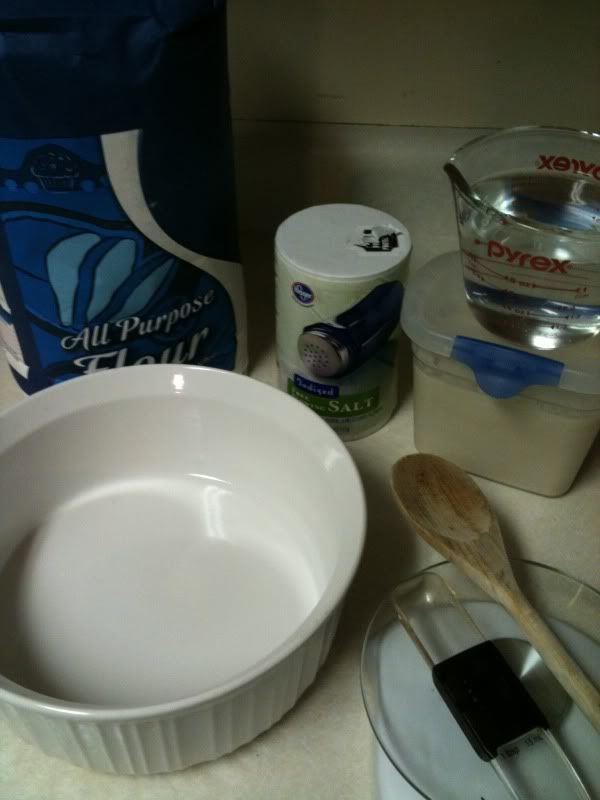
 For both set of directions you will need the following:

  • Flour for dusting the board and your fingertips
  • Cornmeal or Wheat bran to dust loaf
  • Parchment paper (optional) or Proofing basket
  • Dough scraper
  • Cooking spray 
  • Tea towel
  • Dutch oven, corning ware dish with lid, or clay dish with clay lid


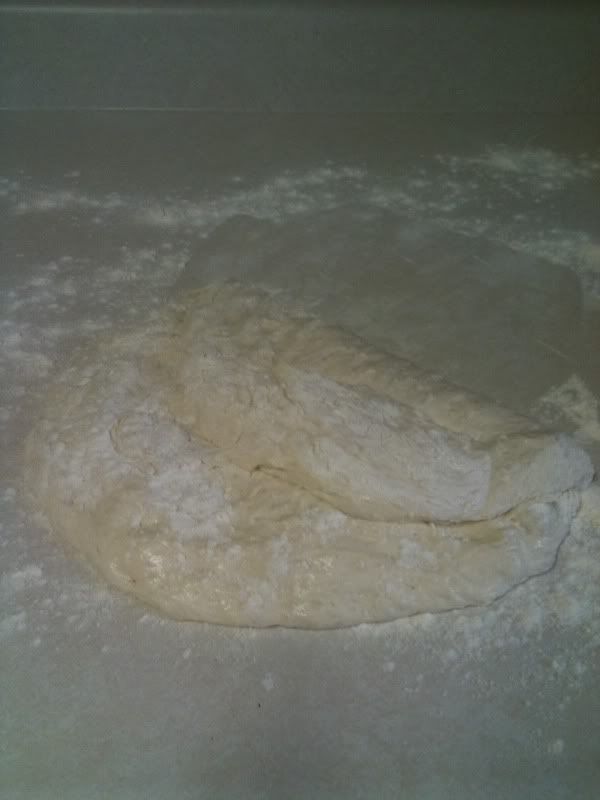
Flour your board/counter top, and turn dough out. Semi flatten the dough out trying not to be too rough with it. Dust with more flour on top. 


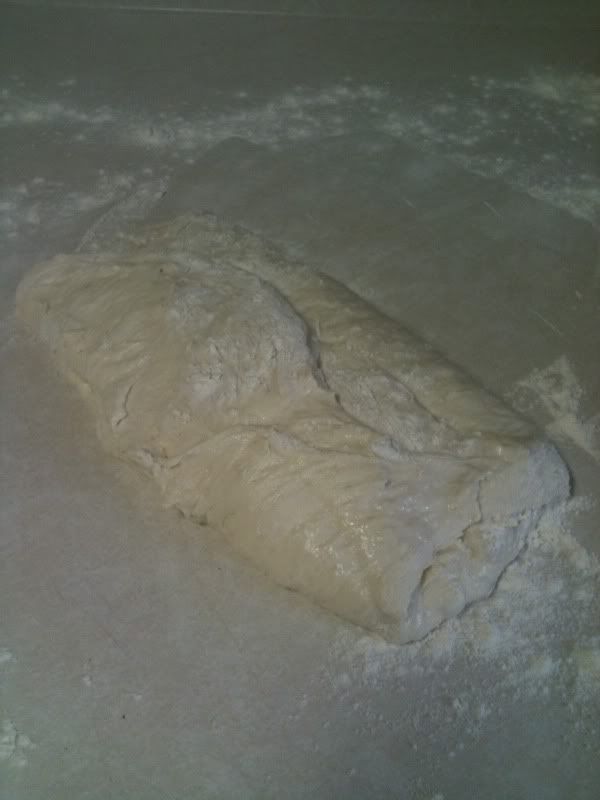
Fold dough into thirds. If dough sticks to your board, use your dough scraper to help fold the dough.


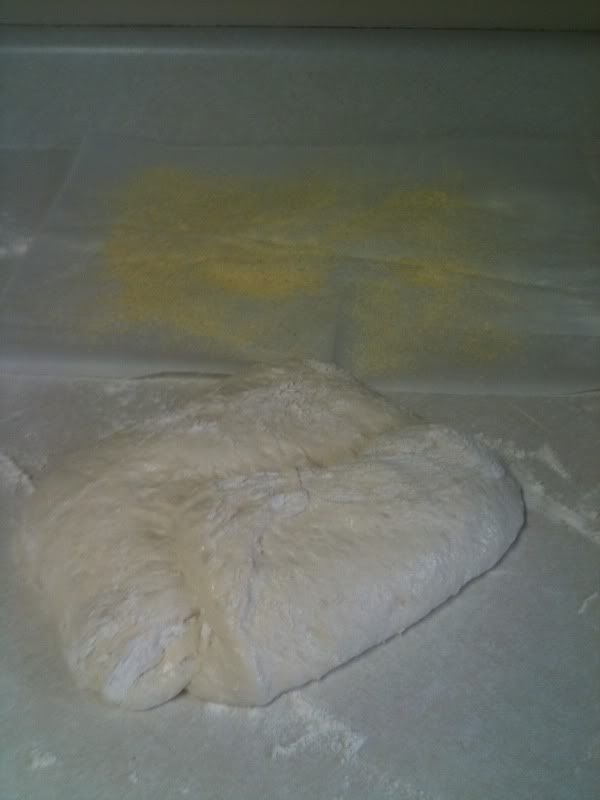
Fold dough into thirds again. This should sorta resemble a square.


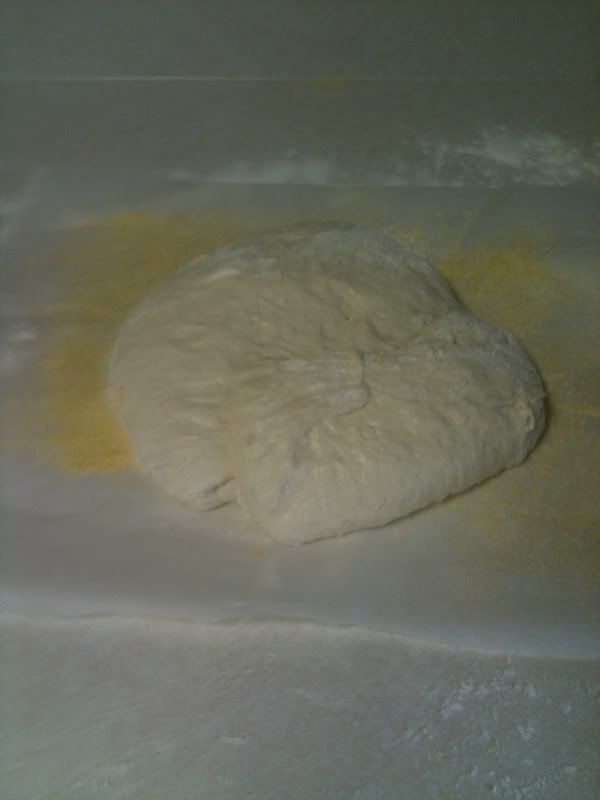
Lightly spray parchment or proofing basket with cooking oil and dust with cornmeal. Move dough onto dusted parchment paper, and back into your clean mixing bowl. This helps round out the dough.


Now here is where the directions will differ. Direction #1 will bake immediately, and direction #2 will bake after resting 2 hours.


Directions #1:
 If using these directions, preheat your oven to 500 degrees adding in your baking dish and lid into the preheating oven before you fold your dough.  

Once your oven has been preheated for 15-30 minutes, place your dough into the heated baking dish and cover with the lid.

Bake with the lid on for 30 minutes. Remove the lid after 30 minutes, lower the temperature to 450 degrees, and bake an additional 15-20 minutes.


Directions #2:
After rounding out the dough, let it rest for 1:30 minutes. After the allotted time, preheat your oven to 500 degrees adding in your baking dish and lid into the preheating oven.

Allow an additional 30 minutes of rest while your oven is preheating. Bake with the lid on for 30 minutes. Remove the lid after 30 minutes, lower the temperature to 450 degrees, and bake an additional 15-20 minutes.


Once your bread is done, DO NOT cut into it. As tempting as it is to eat HOT fresh baked bread, it still needs to cool down. I have found that my bread is drier if I cut into it too soon. So remember your patience will be rewarded for waiting.

I hope that you have found this tutorial helpful, and if you have any other tutorials you would like me to do, please feel free to leave me a comment. 

Also, don't forget to enter the contest for the $5.00 Amazon gift card I have going. I still only have one entrant. This giveaway will expire at 2:00 PM PST on September 1, 2011.Enjoy!


Photobucket

Day 4 of the "I too can bake bread challenge" - The sponge

Ahhh...now comes the fun part, Baking the bread. I always start this bread the night before I want to have bread. For instance, if I want to serve this bread with my dinner on Monday, Sunday night before I go to bed, I mix my bread together and leave it to sit overnight. I have the luxury of baking during the day, but if your a working gal/guy, just go ahead and mix it before you go to work. By the time you get home from work, it should be well risen enough to bake for dinner. 


Here is a list of ingredients that you will need:


  • 16 ounces of flour (all purpose, whole wheat, bread or a combo) by weight or approximately 3 1/2 cups by measurement.
  • 1 1/2 teaspoons of salt
  • 1 1/2 cups of purified water
  • 1/4 cup of Sourdough starter


Whisk dry ingredients together. Add sourdough starter to the water and stir until combined. Add the wet ingredients to the dry ingredients and stir.


Your mixture should resemble thick pancake batter. It should be too wet to knead. Let's just say the wetter your dough is, the bigger the "crumb" will be. That means larger holes. :-)

Cover your bread with cling wrap, a plastic grocery bag, or lid (depending on your mixing bowl) and leave it overnight or for 12 hours.


Next stop is the actual baking tutorial. Enjoy!


Until next post,
Photobucket

Monday, August 29, 2011

Bryan & Kaleo-What true love looks like!

A few weeks back we had the honor of attending the wedding of Bryan and Kaleo. These two have been sweethearts since I can't remember, yes really that long. Anyways, I have watched them grow up and become God fearing young adults. For those looking to get married in the future, take note. These two did it right! They are what true love and waiting is all about. Congratulations on your union. I (we) can't even express how happy I (we) are for you two. 


As with all weddings there is always wedding cake. So when Sis. Kaleo asked me to make her wedding cake, I was honored to say the least. It's not like they can redo their wedding over next year (like a birthday). Overall, I felt very confident in making the cake, but it's still nerve wracking. I hope I didn't let you down. Here is the final product. Enjoy! 


The two bottom tiers are dummy cakes, and top tier was a lemon cake with raspberry filling.


Until next post,
Photobucket

Sunday, August 28, 2011

Reminder to enter the $5.00 Amazon Gift Card giveaway

Just wanted to remind you about the current $5.00 Amazon Gift Card giveaway I have still going. As of right now I only have one entry. This giveaway will end at 2:00pm PST on Wednesday, August 31, 2011  Thursday, September 1, 2011. I'm extending the deadline because I didn't finish the challenge posts until early Tuesday morning. If you need to catch up or get the details, you can do so here. Enjoy!

Until next post,


Saturday, August 27, 2011

The thrifty couple

Just wanted to let you know about a blog that I have been following for the last couple of months called The Thrifty Couple. I originally found them when I was looking on ways to save on diapers, but I've found so many nuggets of wisdom on their website. Their testimony is inspiring. I encourage you to stop by and check out their website. Right now they have two awesome giveaways going for $200 in cash plus a $40.00 VIOlight gift certificate. Enjoy! 


Until next post,


.Photobucket

Wednesday, August 17, 2011

I didn't forget to bake bread...

Sorry it's been super busy around here. I'll have the tutorial up in the next few days. In the process of baking the bread today. :)
Photobucket

Sunday, August 7, 2011

Day 3 of the "I too can bake bread!" challenge- Toss and Feed


From here on out, it's so easy that you'll wonder why you didn't start making bread ages ago.

For the next few days, you will be again repeating the following steps but with a minor change. You will need to toss out 1 cup of your starter, before feeding it. Please do not move on to the baking segment until your starter looks frothy and bubbly.

For Day 3, you will need the following: 

  • 1 cup of purified water
  • 1 cup of Bread Flour or All-Purpose Flour (Not self-rising)
  • Something to stir your starter with (chopstick, spoon, but please no metal)
Remove 1 cup of starter and toss it in the bin. Add your 1 cup of additional flour and water. Stir to combine.


Once combined, it should look something like this. This starter is almost ready to make bread.


After a few days, if your starter looks like mine (see above for reference), all bubbly and frothy, just put it in the refrigerator until the next tutorial is up about baking bread. 

The wonderful thing about starter is that it's pretty hearty once you capture the wild yeast. In the last post, I mentioned that you have about two cups of start, you will want to keep the volume around that. It's always best to refresh your starter with the same amount that you are keeping. So for instance, if you keep 1 cup, add 1 cup of flour and 1 cup of water...etc. 

Once your starter is frothy and bubbly, you can just place it in the refrigerator and refresh it every week by following the same instructions as Day 3. If your starter is not bubbly, try feeding it for a minimum of 7 days (with Day 3 instructions) before tossing the whole batch and restarting. I'm not sure why, but sometimes the yeast doesn't capture well, and other times, it just takes off.

Please let me know if you have any questions. I'll do my best to answer them. This will conclude the starter part of the challenge. Next week, we bake bread.

Until next post,

Photobucket

Thursday, August 4, 2011

Day 2 of the "I too can bake bread!" challenge- Frothy and bubbly

WOW! My starter just took off, and it looks like I am WAY ahead of what most of you will be at right now. 

For the next few days (anywhere from 2-7 days), you will be repeating the following steps in order to catch up. Please do not move on to the baking segment until your starter looks frothy and bubbly.

For Day 2, you will need the following: 

  • 1/2 cup of purified water
  • 1/2 cup of Bread Flour or All-Purpose Flour (Not self-rising)
  • Something to stir your starter with (chopstick, spoon, but please no metal)


Add the additional flour and water to your starter and stir to combine. This is considered "feeding" your starter. Cover loosely with a lid again, stirring occasionally throughout that day.

At this point, you will have about 2 cups of starter. The rule of thumb is to double your starter when you "refresh" or "feed" it, and since we added a half cup, that is considered as doubling our starter.

Stay tuned in for Day 3.

Until next post,
Photobucket

Tuesday, August 2, 2011

Day 1 of the "I too can bake bread" Challenge

Firstly, I want to apologize that this was not done in a more timely manner.....but I have an explanation for that. I had to get ahead of you so that you could know what your starter would look like. :)


With that being said, here is what you will need:

  • 1/2 cup of purified water
  • 1/2 cup of Bread Flour or All-Purpose Flour (Not self-rising)
  • Something to stir your starter with (chopstick, spoon, but please no metal)
  • Glass or Plastic container


Ingredients


Pour flour into container


Add water


Mix.


Give it a stir until combined.


Cover with a lid loosely. Do not seal it though.


Every few hours you will want to stir your mixture around. And that's all you need to do for Day 1. 

**To enter the $5.00 Amazon gift card giveaway, please leave a comment on each of the "I too can bake bread"  posts. One additional entry per person can be earned by blogging about the giveaway/challenge and leaving a separate comment including the link. A total of two entries per person maximum**

Happy baking and good luck!


Photobucket

Coupons for sale can be found above

LinkWithin

Related Posts with Thumbnails